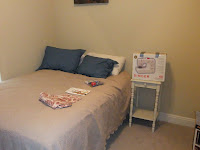
First, my work station. The machine - still in the box, the bed as my table, the fabric, the pattern, and my trusty sewing kit.
My favorite and most useful tool. The pin cushion and corresponding pins.

After adorning my pin cushion with. well, pins, I cut out my fabric pieces. This was incredibly complicated and difficult. Seems like it shouldn't have been. I mean, cutting. How hard can it be? Trust me, when you don't have a table and can't see the chalk line you are are supposed to cut down because the fabric is light-colored, cutting can be very hard. All the same, I eventually got it done. Please note, the little piece that looks like a pocket. I decided, after spending an hour cutting out that pocket, that I didn't want to put it on my apron. Such a waste.

Now, the next thing I did was attach the ruffle. After all, the thing I was most excited about on the apron was the ruffle. The picture below is the ruffle, only un-ruffled. I haven't read a pattern since 9th grade home economics, but I think I can safely say that the pattern did not have instructions for how to affix the ruffle to the skirt in such a way that the six feet of ruffle would match up perfectly with both sides of the top. I decided to wing it. I pinned it with my oh so handy pins and just went crazy with the ruffle. For about the first six inches. Then, I decided to just stick it in the machine and free style it. That worked amazingly well. Until about the half way point on the apron and I realized that I was out of ruffle. In fact, I used the entire six feet of ruffle in about 16 inches of apron. I know, I am a ruffle freak.

This is a picture of me, free-styling it with the ruffle. Look Mom, no pins. No, my mom does not read this blog.
And again. I know, I'm pretty handy to have around. So, once I realized my ruffle error, I cut out another six feet and free styled it some more. Just think, a total of 12 feet of ruffle on a 3 foot apron. Be impressed.

Looks pretty serious huh? Look closely. Notice anything wrong? You might not can see it, but I committed a grievous error. I free styled it a little too much. See how in the above picture the print is facing each other? Well, in my second batch of ruffle, I sewed the ruffle on to the apron backwards. Yep, I'm a winner. And by backwards, I mean that the part where it was stitched together was on the front and completely visible. In other words, wrong. Fail.

So what happens when you sew something incorrectly and care enough to want it to be correct? Ripping. Seam ripping. Know what the instrument is called to rip? A seam ripper. Pretty intuitive huh? Just think, about 18 inches of seams on 6 feet of fabric. Gross.

I fixed it. Finally. It may have taken about six hours, but I did it. Here's a picture of the finished product. Crafty. In know, right. Well, it isn't exactly perfect, but you can't tell. It was not my "vision," but it works. It is an apron. It has ruffles.
 I don't think I'll be making anymore ruffled aprons. Next "task" will be onesies. With about a million babies coming to my friends in the near future, I can make the onesies and then spend the money on monogramming or screen printing. I'm excited about that. Perhaps I can make some with ruffles.


No comments:
Post a Comment